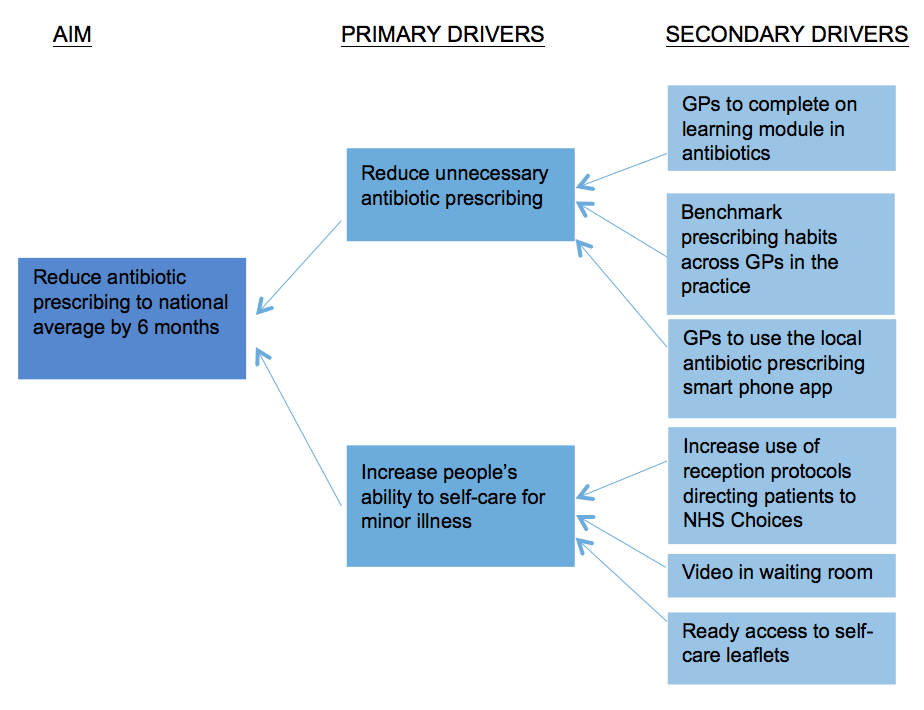
A driver diagram is a tool to help you to organise your improvements in a logical way, so that everyone involved can see how the planned changes will lead to the desired improvement.
Download RCGP Quick guide: Driver Diagrams
It is particularly useful when you are aware of several changes that need to happen before you are likely to see improvement.
Making a more complex project easy to visualize helps to engage others in the changes.
Some organisations use a driver diagram to plan the direction of their work following development of a vision or mission statement.
Figure 1: Driver diagram to reduce antibiotic prescribing

How to
Step 1: Define your aim
Step 2: Generate ideas
Use the whole team to generate ideas (or ‘drivers’) that are likely to move you towards your aim.
Step 3: Group the ideas into themes
Once you’ve generated the ideas, group them into themes:
- ‘Primary drivers’ – an agreed set of high level factors that help you towards your aim. Make sure you use language like ‘improve’ or ‘decrease’ and that each driver is clearly defined (and potentially measurable).
- ‘Secondary drivers’ – ideas that help you to achieve your primary drivers. Arrange in the second column of your diagram. Each Primary Driver will be influenced by several Secondary Drivers.
Step 4: Add actions or interventions for each driver
Step 5: Add measurements
Finally, decide which drivers and interventions that you want to measure and add those to the diagram.
When completed the diagram provides a change strategy that can be shared and understood, and can provide the basis for planning the individual projects or interventions. It should not be considered ‘fixed’, and can change over time as improvements are generated.
Figure 2: Driver diagram to reduce antibiotic prescribing (example actions and measures)


